BASIC HIGH JUMPING TECHNIQUE
MEASURING THE APPROACH
Slower, inexperienced jumpers = narrower radius (9-6”-11-0”)
Faster, experienced jumpers = wider radius (11-0”-13-0”)
Approach = 8 to 10 steps
_______________________________________________________________________
_______________________________________________________________________
APPROACH
The first step is very important and sets the tempo for the whole approach. The first three steps must be driving in nature, then the athlete can assume the running position. After the 5th step of the approach every step MUST cross in front of each other to ensure proper lean. The last three steps MUST be flat footed and crossing while maintaining inward lean. Try to get hips to go from horizontal to vertical with the least amount of deceleration at takeoff.
Measuring the approach (triangle through the middle)
Two Check Marks
Slower, inexperienced jumpers = narrower radius
Faster, experienced jumpers = wider radius
Approach Run (first 5-steps)
The first, second and third steps are very important.
Each step on the approach must have an increasing tempo.
The turn starts on the 5th step (I would recommend a check mark here)
Approach Run (last 5-steps)
Steps 6-10 MUST be crossing in nature while maintaining tempo.
The athlete must have enough speed by step six to create the appropriate inward lean.
The toes must stay dorsi flexed throughout the approach.
Preparation Phase (last 3-steps)
Center of gravity lowers due to ankle and knee flexion only (no bending at the core).
Foot contact must be under the hips, not way out in front.
The last three steps must be flat in nature.
The jumper must continue to lean inward until takeoff foot hits the ground.
Heel-toe (roll over) on steps 8-9-10.
ARMS COME TOGETHER ON STEP 8 (IN FRONT)AND STAY TOGETHER UNTIL TAKEOFF.
_______________________________________________________________________
NOTES:
Once the athlete leaves the ground very little can be done to change the outcome of the jump. Almost everything that happens in the air is determined during the approach.
If the high jump technique on the ground is correct, the athlete doesn’t need to worry about what happens over the bar. Natural manipulations occur during flight, stemming mostly from the action-reaction principle.
A jumper must never slow down at takeoff.
The approach should be a constant acceleration from the beginning of the run until takeoff.
TAKEOFF (TRANSITION PHASE)
The purpose of the transition phase is to develop maximum vertical velocity without slowing speed in the horizontal direction. Impulse (force x time) is what determines vertical velocity. The longer the force can be applied from a low position to a high position, the greater the vertical velocity will be.
Align body posture so that at ground release, the jumper rotates forward and laterally at the same time ensuring that speed of rotation is enough to get the jumper’s body over and around the bar as quickly as possible.
Athletes can use a variety of arm actions at takeoff:
Double arms on step 9 (right arm stops at hip)
Single arm on step 9 (right arm reach)
Double arms on step 7 (swimming action)
Takeoff (Transition) Phase
Align body posture so that at ground release, the jumper rotates forward and laterally at the same time ensuring that speed of rotation is enough to get the jumper’s body over and around the bar as quickly as possible. The longer a force (with horizontal speed) can be applied from a low position to a high position, the greater the vertical velocity will be.
Take off foot and chest point (aim) toward far standard.
Head stays level, ear tilts to the crossbar as arms and lead knee drive upwards.
Jumper goes from inward lean of 10-15 degrees to an outward lean (cheat) of 5-10 degrees.
Both arms drive upwards as the lead knee drives across the body.
## Make sure your athlete does not right hook the takeoff arm
_______________________________________________________________________
______________________________________________________________________________________________________________________________________________
NOTES:
During the last three steps, flexion of the knee and ankle must occur.
Foot contact must be directly under the hips, not out in front.
The last three steps must be flat footed.
The athlete must continue leaning away from bar until takeoff foot makes contact with the ground. (Helping to create centrifugal force)
The takeoff foot should be planted 15-20 degrees towards to bar.
Takeoff knee is driven high and parallel to the bar and does not drop.
Chest should be facing the far standard at takeoff.
Both arms should try to drive over the head at takeoff (if two armed jumper)
Body should be leaning 10-12 degrees towards bar at takeoff.
LAYOUT
The jumper should not turn back to bar completely until he or she is well above the takeoff surface.
The arms go laterally after getting to the bar or they can drop to sides of body.
The legs are bent and slightly spread until hips pass bar.
The head is arched completely backwards until hips pass bar, then the head can be brought back. You can arch all the way until the pit or un-arch on the way down.
Layout Phase
The takeoff knee is driven high (across the body) and does not drop until hips pass over bar.
Arms go laterally after getting to the bar or they can drop to the sides of the body.
The head goes from lateral tilt to completely arched backwards until hips pass the bar.
Both knees must stay bent to increase rotation over the bar. As bar gets close to the back of calf the athlete kicks out (un-arches).
______________________________________________________________________
______________________________________________________________________
HIGH JUMP DRILLS
Sprint Drills Box Hops Circle Runs
Skipping Drills (Single and double arm) Hurdle Hops Figure 8’s
Various Stadium Stair Drills X-Bar Touches (4-6 steps) Box Layouts
Hill Running (50m-150m) Weight Training Interval Runs
Track Sprints (20m-100m) Approach runs Speed Bounds
Single and Double Leg Bounds Short Run Jumps Hurdle Mobility
Film Sessions Back Arches Core Exercises


 Larry Chavez is the 112th inductee into the NMAA Hall of Fame, with a career in education that spanned over 38 years. He devoted his entire career to the youth of New Mexico.....
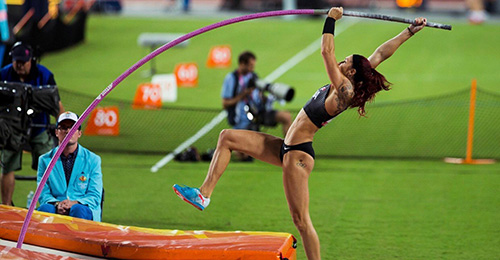
 Newell, a graduate from Highland High School and 3-time State Champion, has attended two Olympic games for team Canada.
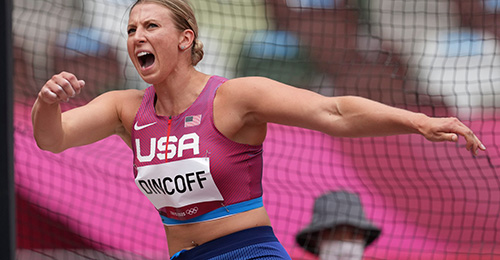
 Former New Mexico State volunteer assistant track and field coach Rachel Dincoff reached the pinnacle of her event...